DIY Angel Wings || Victoria Secret has nothing on me
That’s a lie about my DIY Angel Wings. Victoria Secret owns the wing game. And this was my first attempt. It took me 4 days, but I also live that toddler mom life, and made quite a few mistakes.
But, my mistakes are your gain.
So, what I’m going to do here is walk you through the process of creating my DIY Angel Wings, what I bought, what I needed and what I didn’t end up using, or used and then tore out, because I was over thinking things. Which I do. A lot.
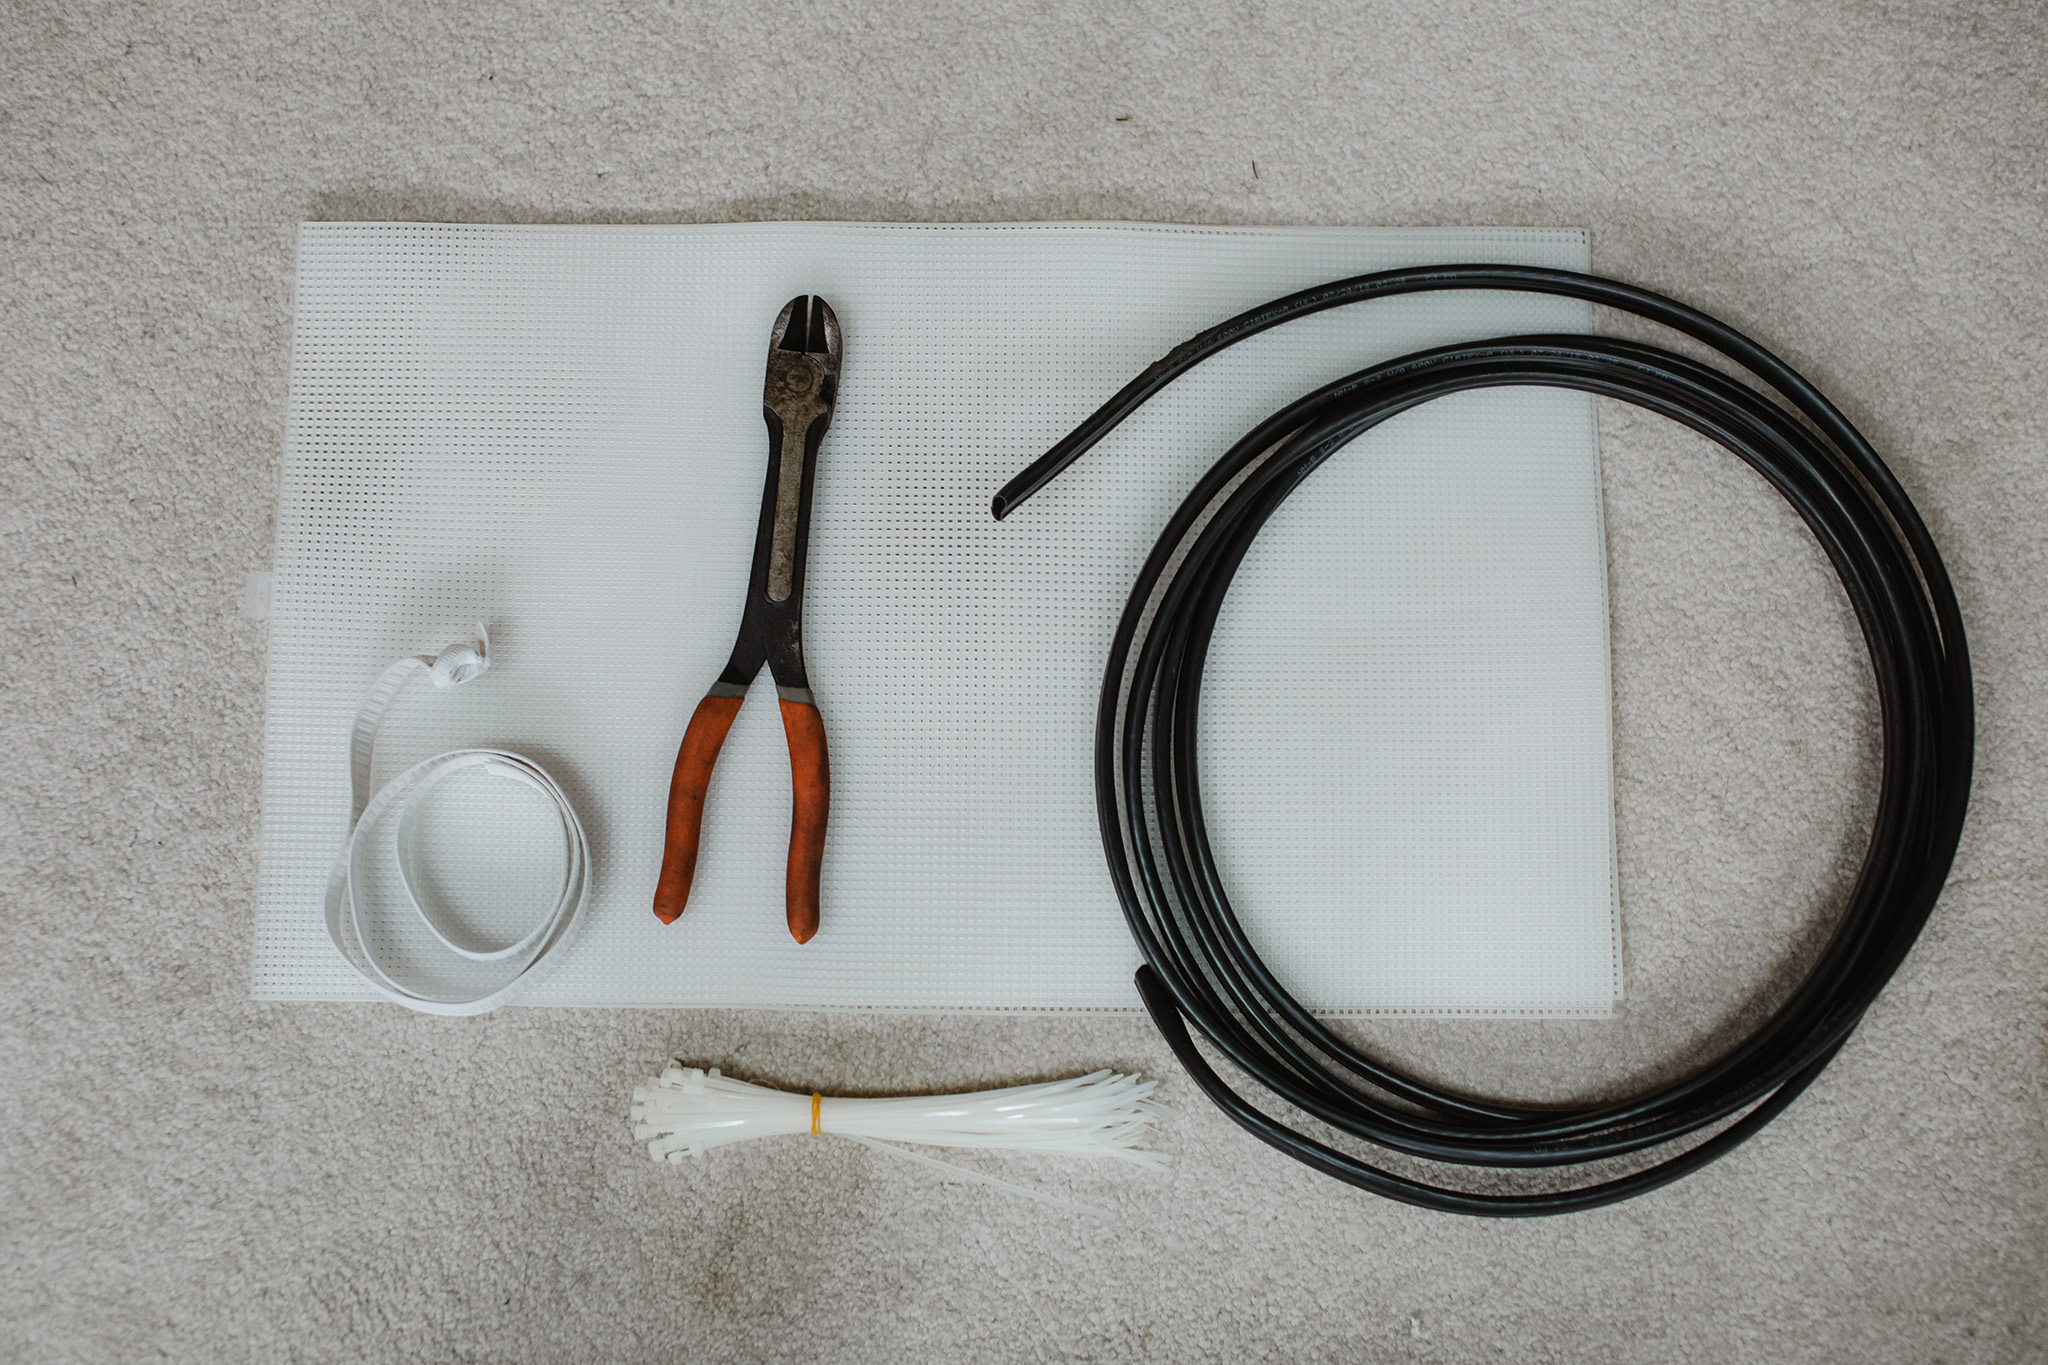
Without further ado, here’s the list of things I bought:
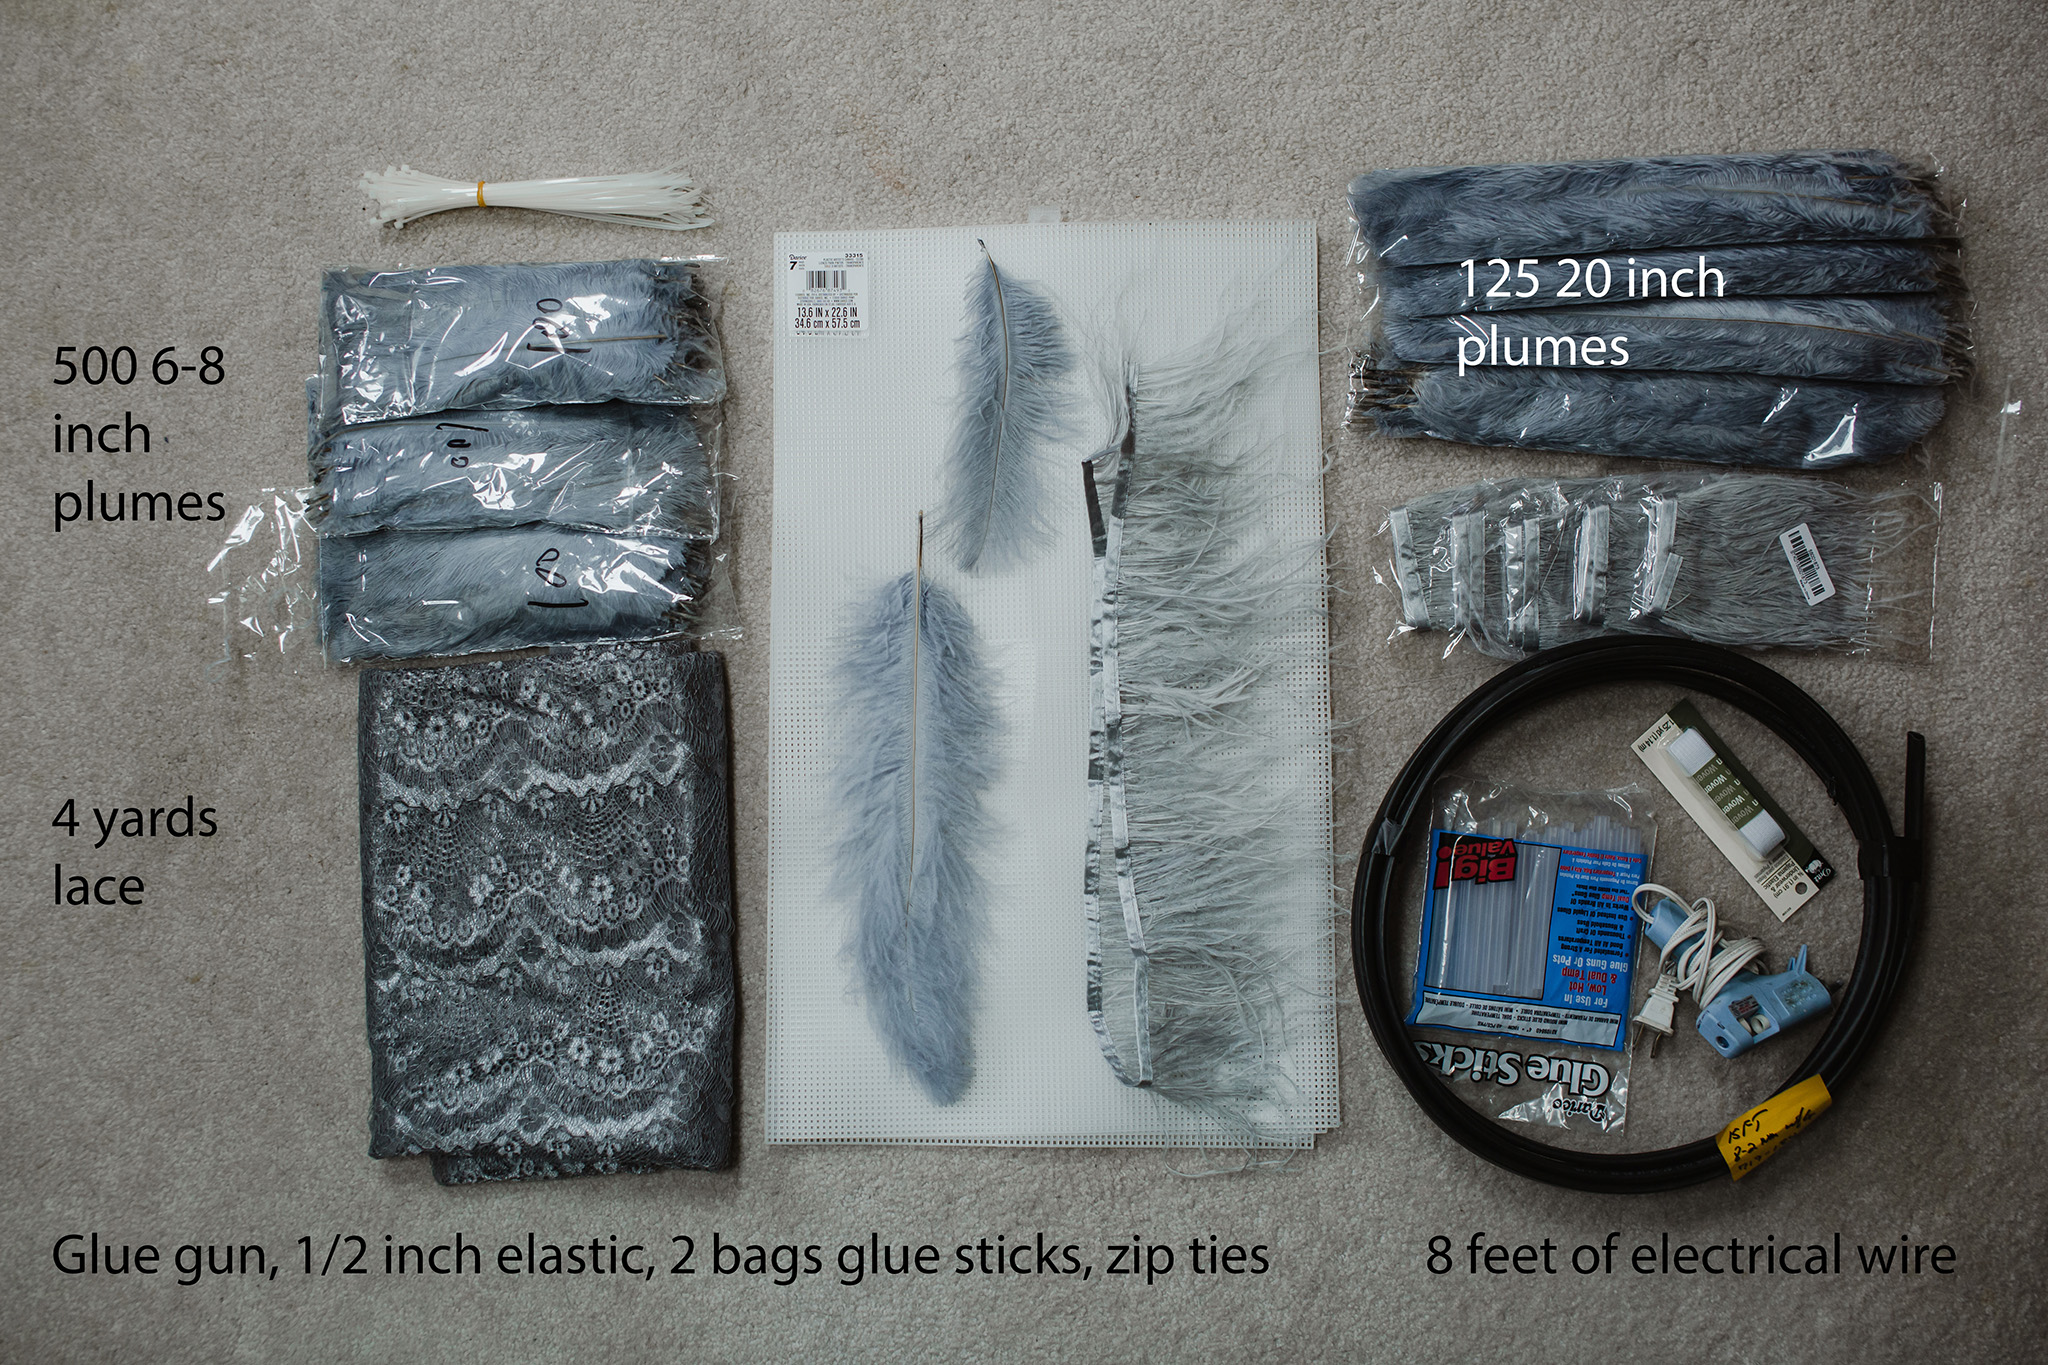
Hot Glue Gun – Craft Drawer
Glue Sticks (2 Bags) – Pat Catan’s
1/2 Inch Elastic – Pat Catan’s
Zip Ties – Garage (winner!)
Copper Electrical Wire – Home Depot
Cross Stitch Mat – Pat Catan’s
Lace (4 yards) – JoAnn’s Fabrics
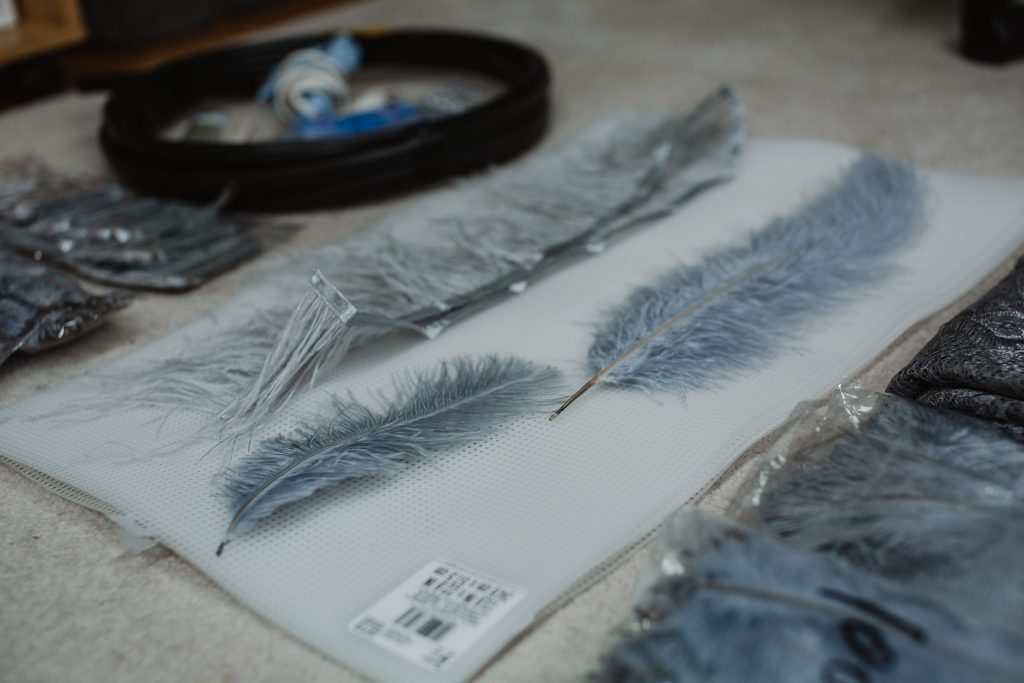
500 6-8 inch Ostrich Feathers – Ebay
125 20 inch Ostrich Feathers – Ebay
Ostrich Fringe – Ebay
Wire Cutters – Hubby’s Garage
 There are several items here that I used, and then discarded. So, before you go and buy everything I have listed, you can cross off:
Cross Stitch Mats
Zip Ties
I began my project with the items to the right. I started by shaping the wire (make sure it’s super difficult to bend, otherwise it will just droop). I know this by experience. I had to go back and buy new, better wire.
I shaped a low dip between the shoulder blades, then the wing arch, and down part of the outer side.
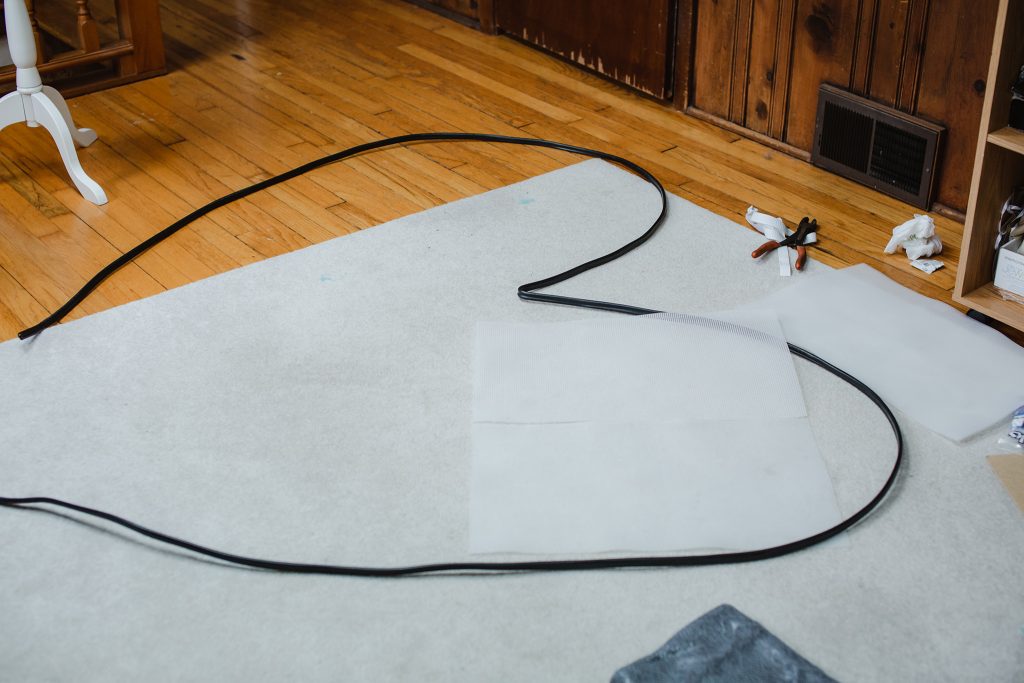
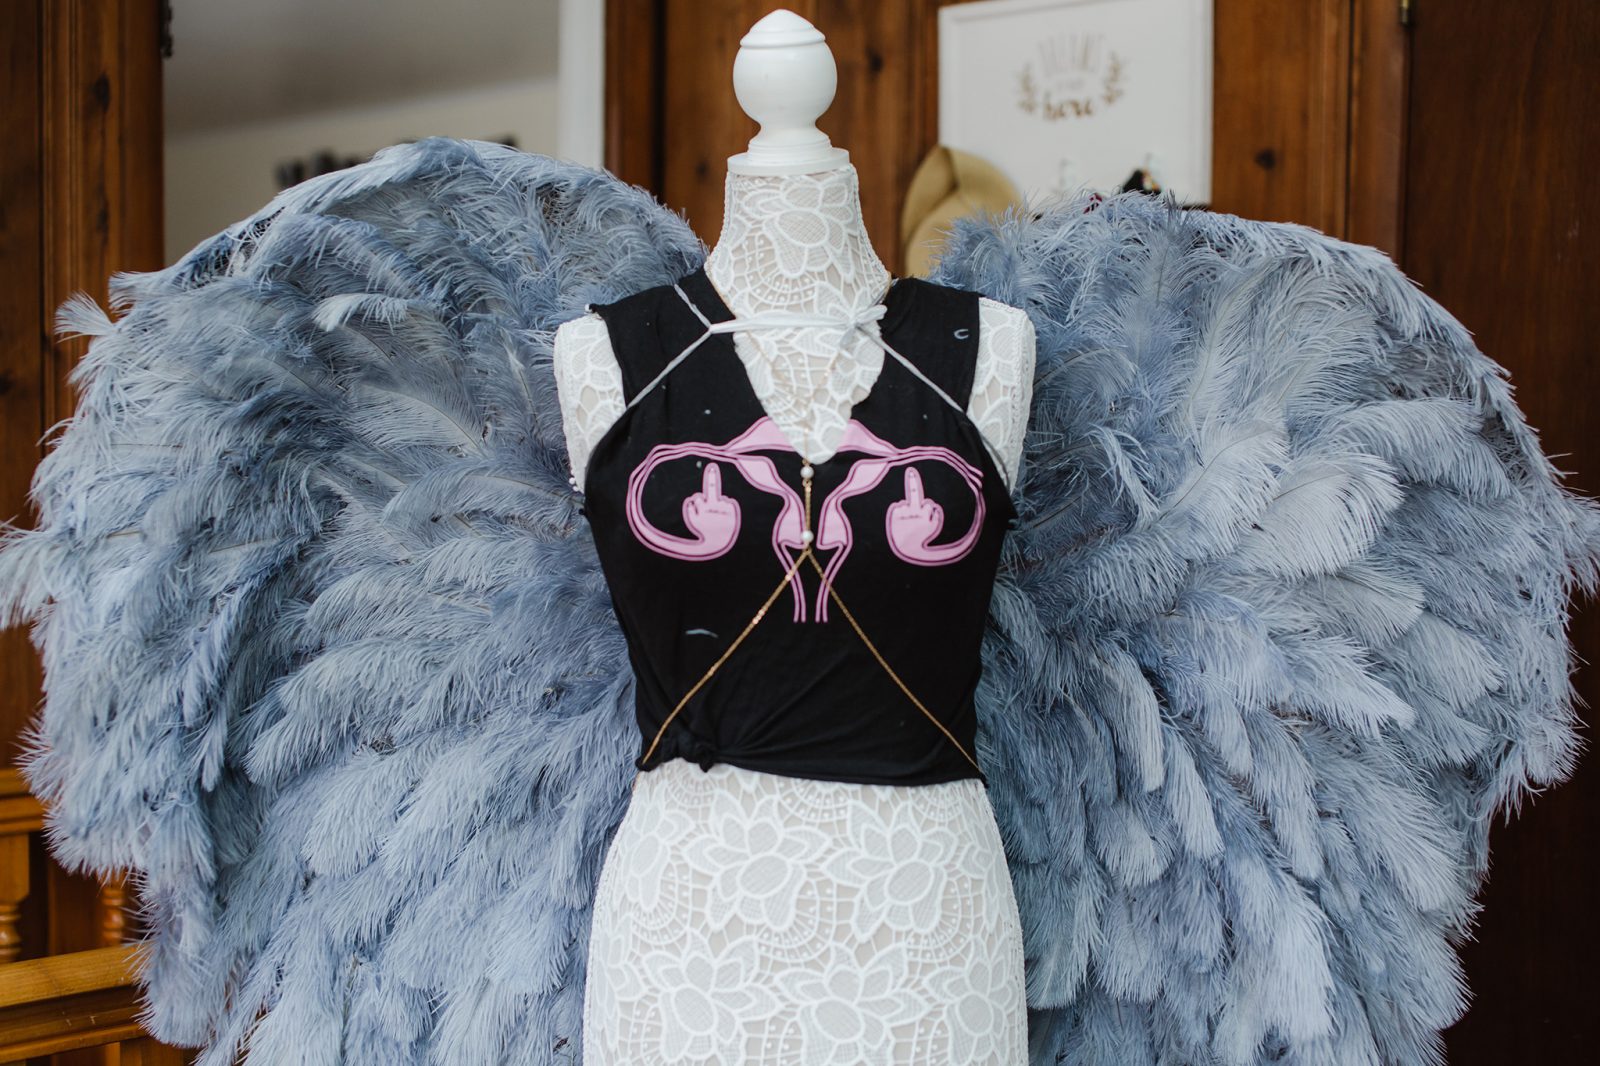
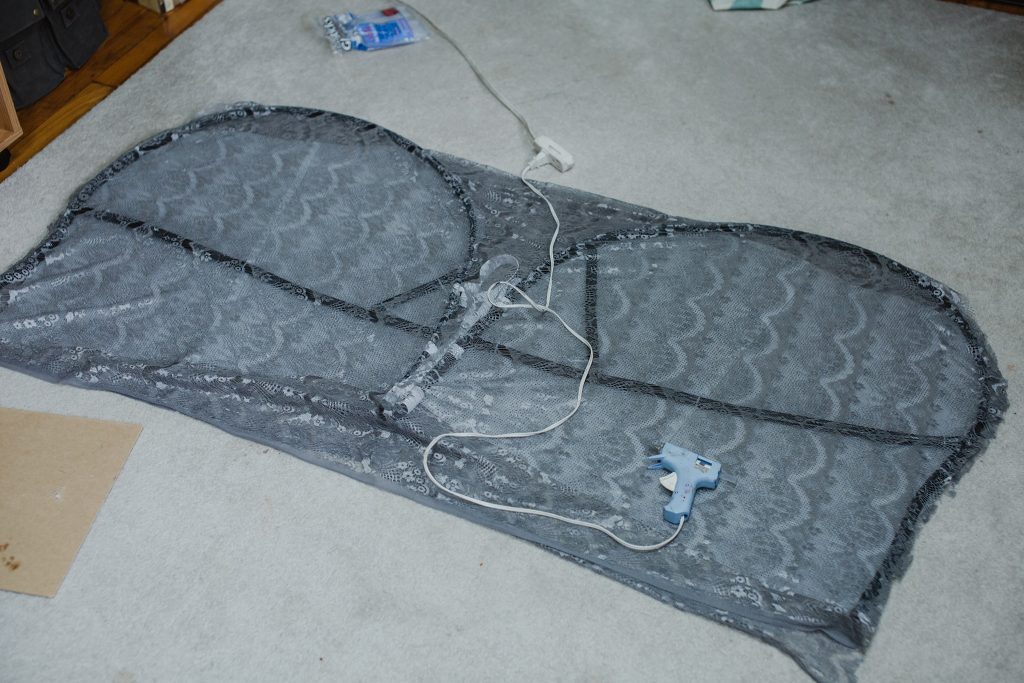
I then proceeded to zip tie the cross stitch plastic together and to the “frame”. I later decided I hated this, because it was poking out over the bum, like a peacock tail. So I removed it. I ended up ONLY USING the wire and the lace to create the frame of the wings.
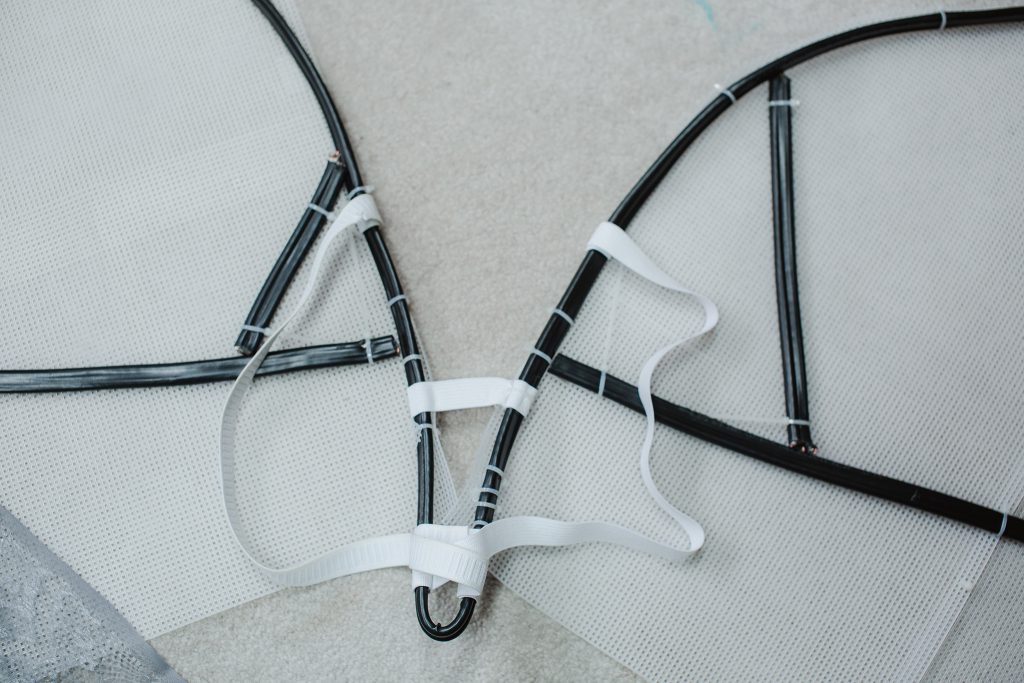
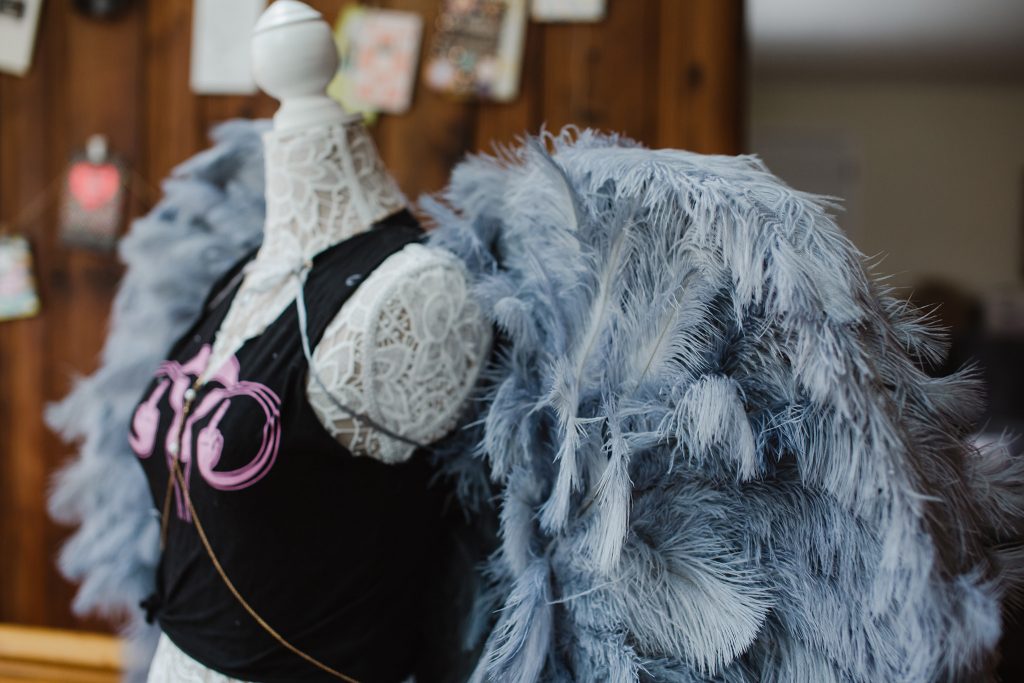
Pay no attention to the cross stitch mat, zip ties, or the wire frame in the wings. I got rid of that the next day once I got better wire. This stuff shown here was just too flexible and too heavy. I did however make straps out of the elastic before gluing the lace onto the frame.
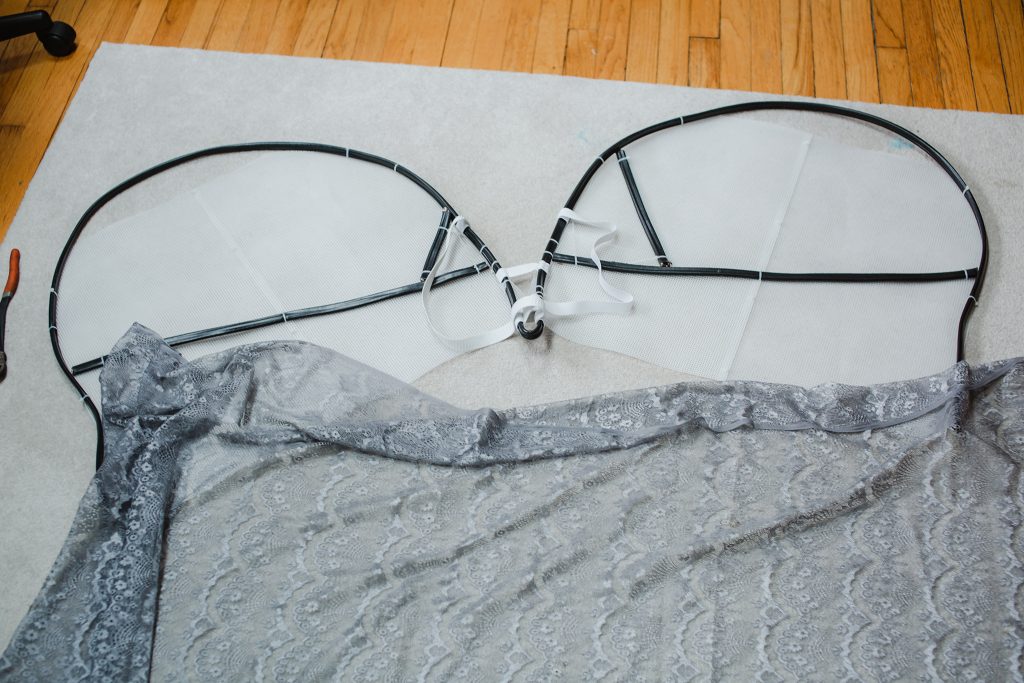
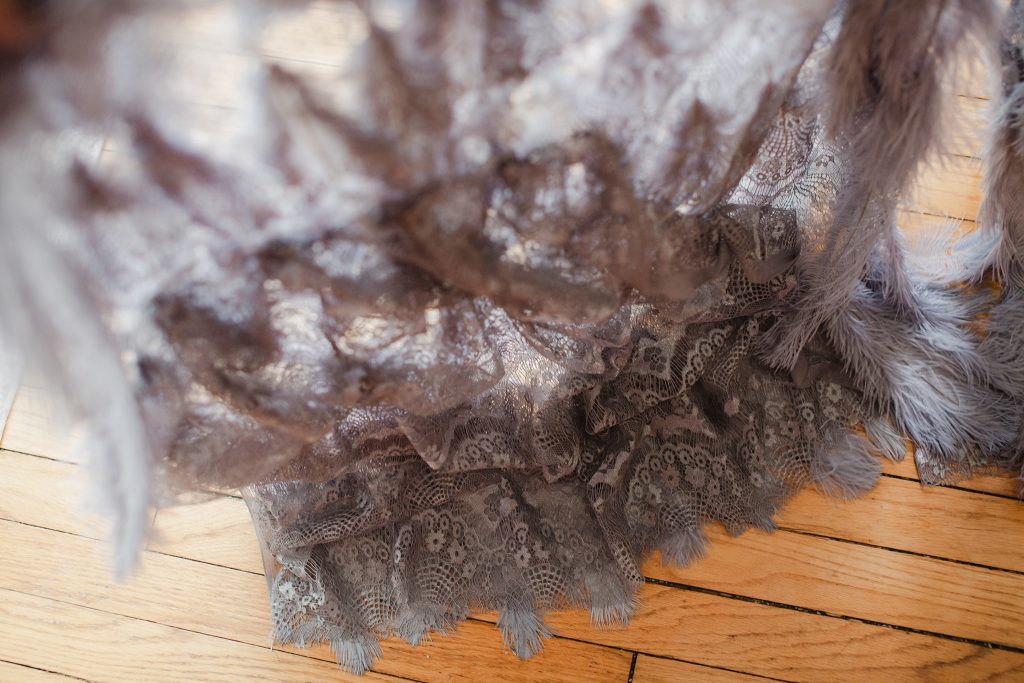
This was two yards of the lace, folded in half over the wing frame. I later add more fabric below the frame.
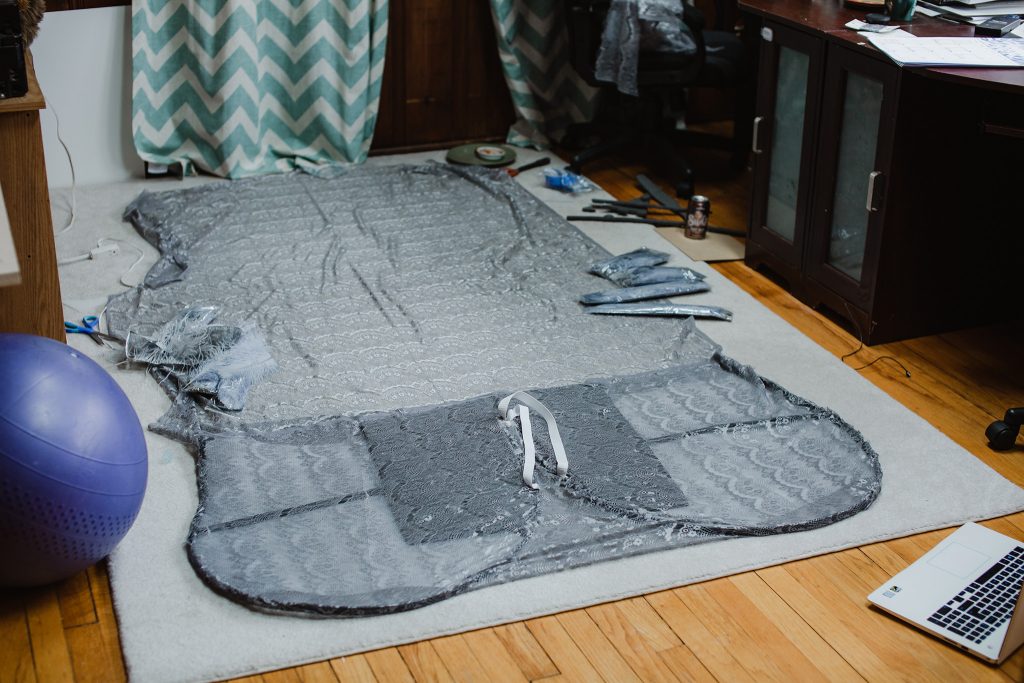
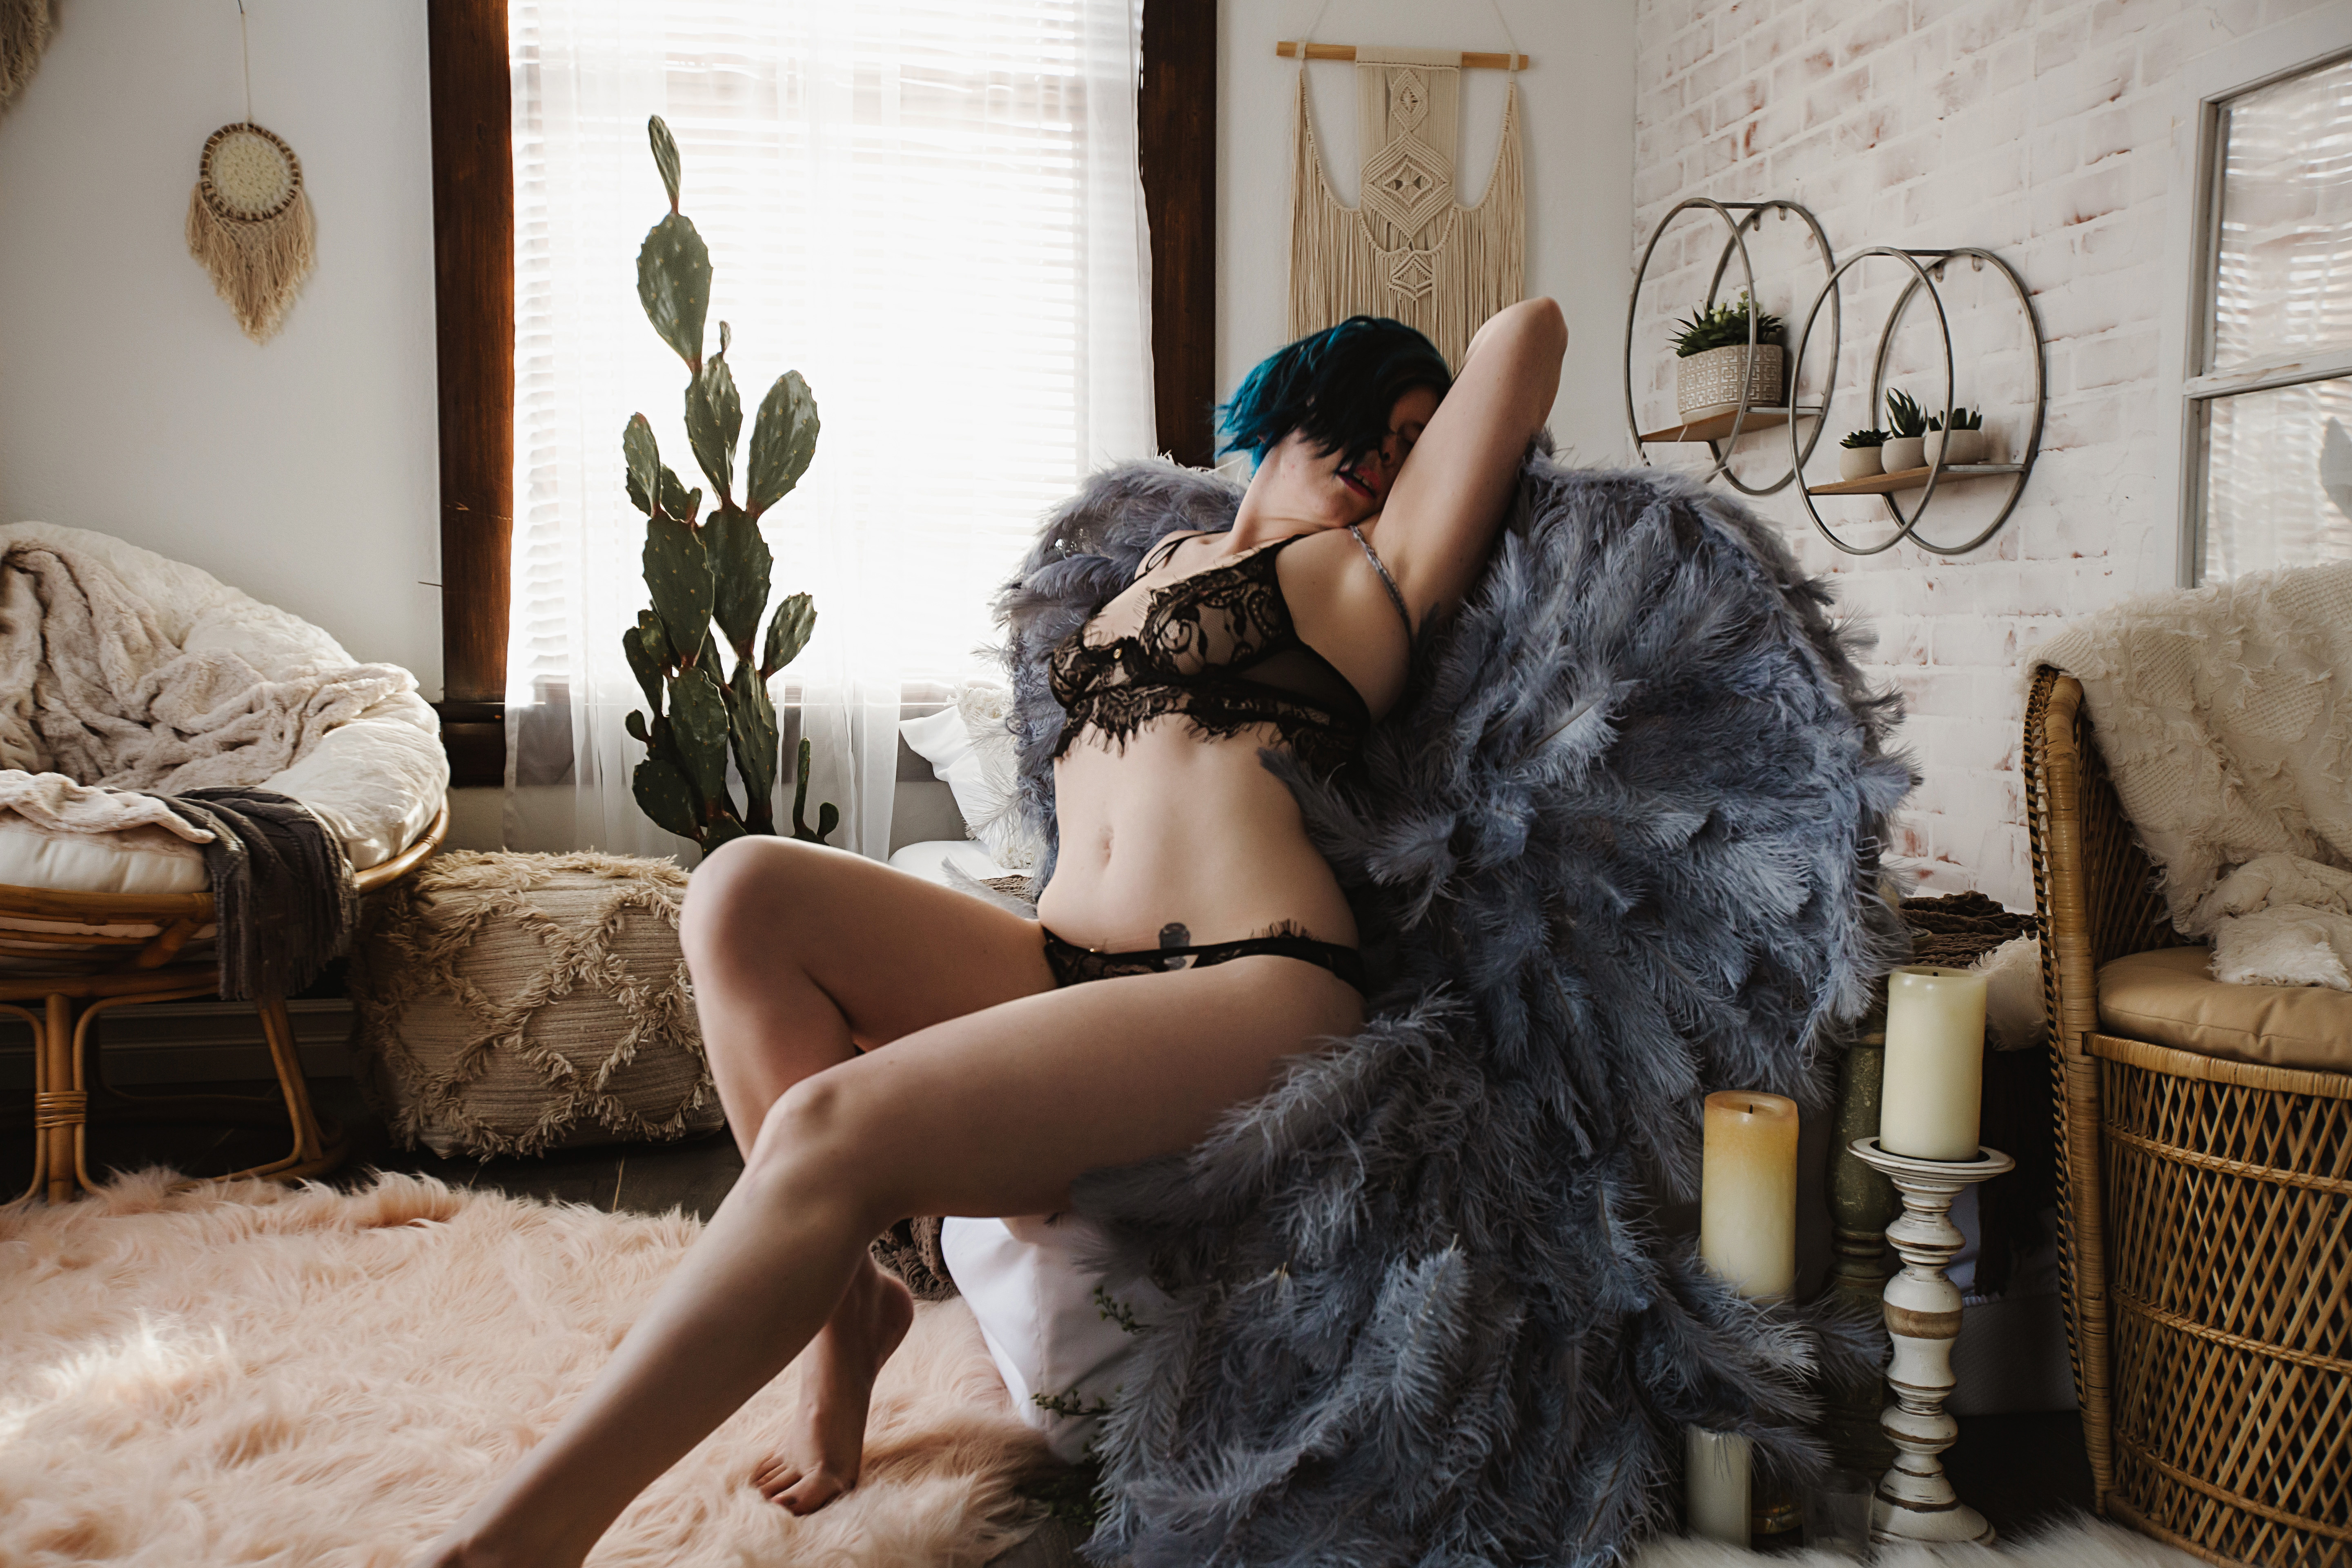
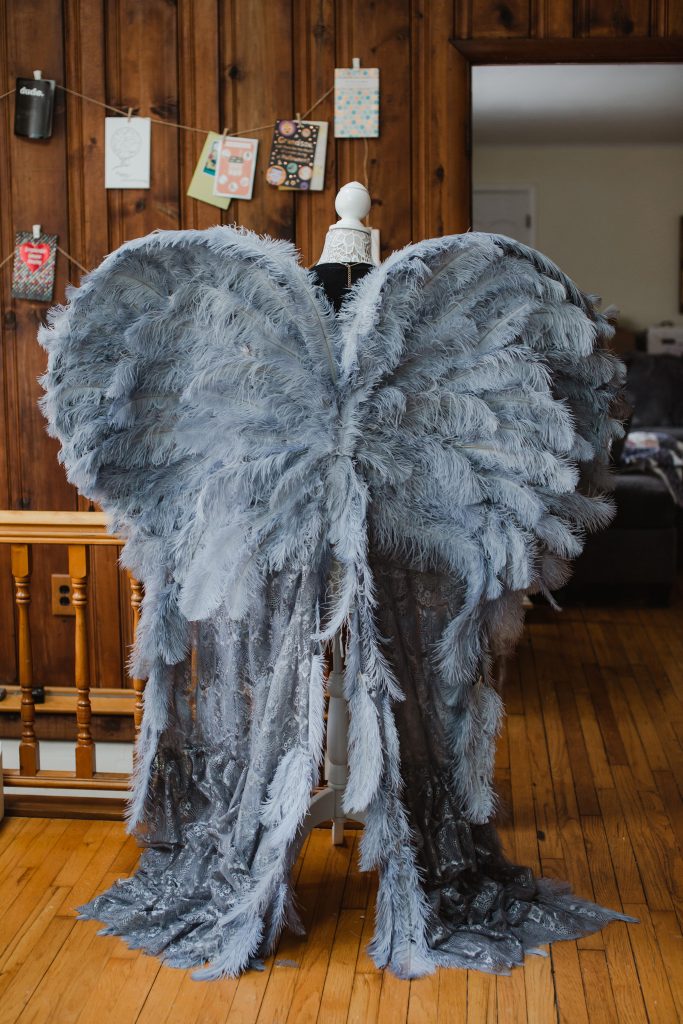
I added 1 1/5 yards of lace to the bottom of the wings. These fit my husband’s 6′ frame and barely touch the ground. I cut the lace up the middle, and shaped it so that it opens above the tush for some hot booty shots!
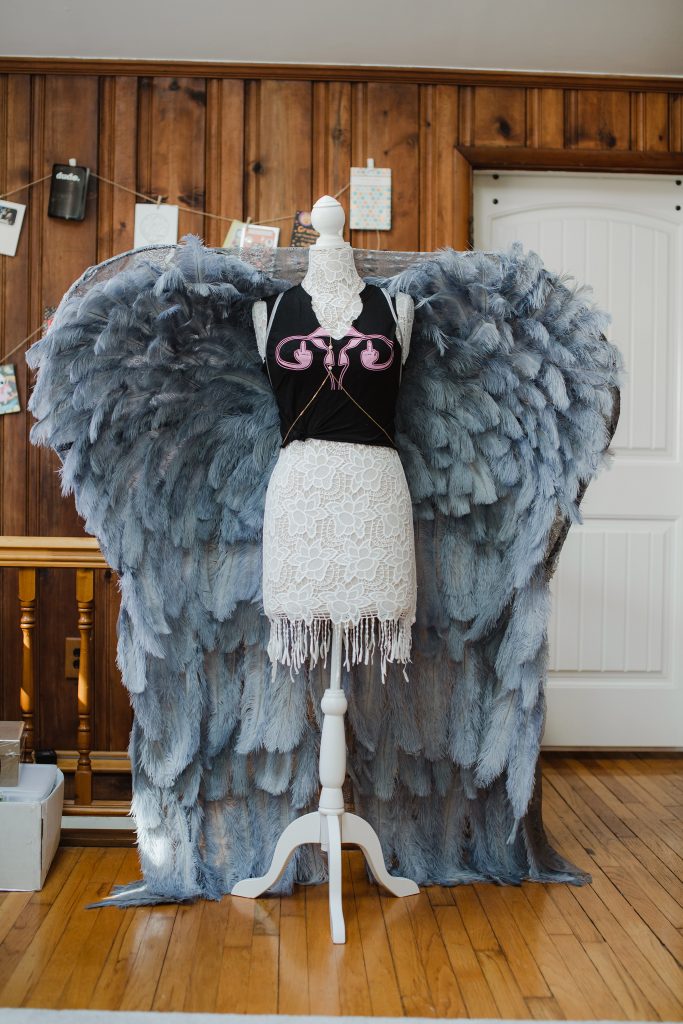
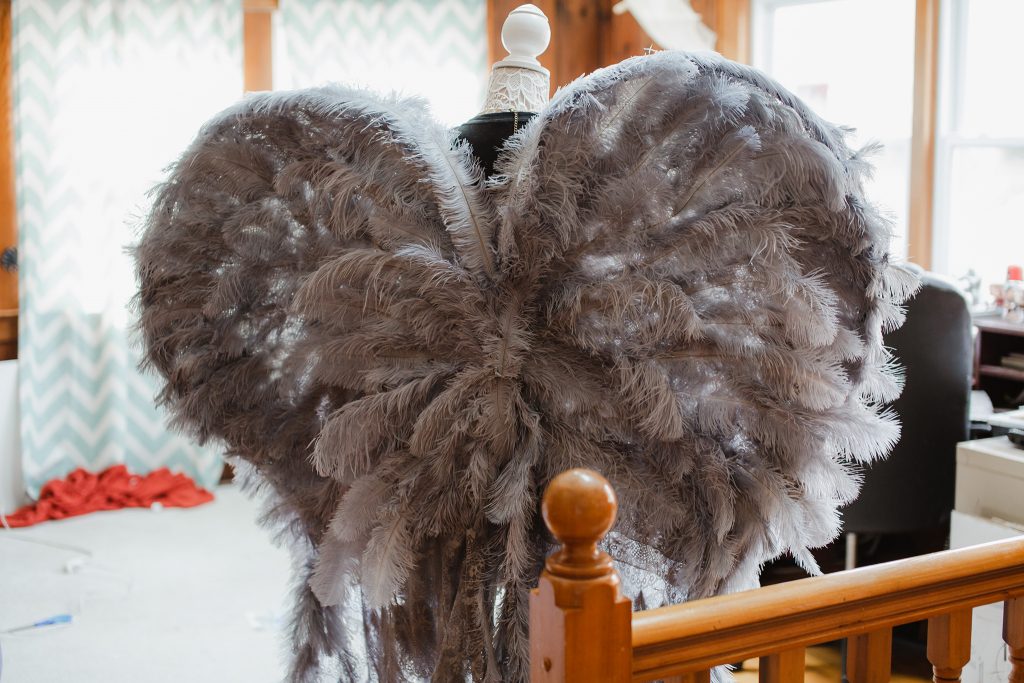
I then hot glue’d the feathers on, starting at the very bottom. I alternated 8″ feather rows with 20″ feather rows. Then once I got to the upper wings, I only used the 8″ on the side facing the mannequin. When I did the back, I did the same on the bottom, but used the 20″ feathers on the upper portion.
You can see here how the DIY angel wings really pulled hard on the fabric between them (by the neck). I eventually would cut that, and I knew it would just make it droop even more than it already was. It was also caving in on the mannequin. I needed to do something else. So I replaced the wire, with 1 gauge copper wire in a black sheath from Home Depot (it was $1.98 a foot).
This is also when I took the cross stitch mat off, as it was poking out in an unattractive fashion.
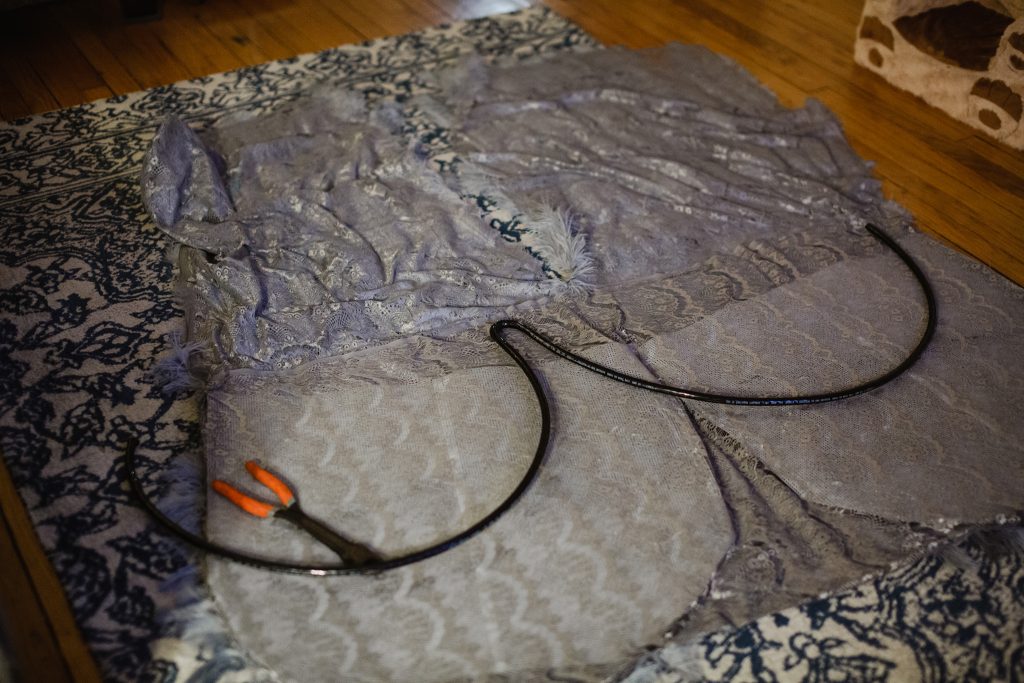
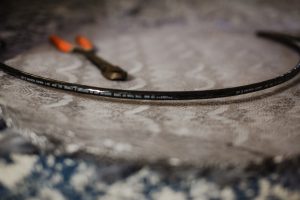
This is the wire I used when I replaced the other, useless floppy wire.
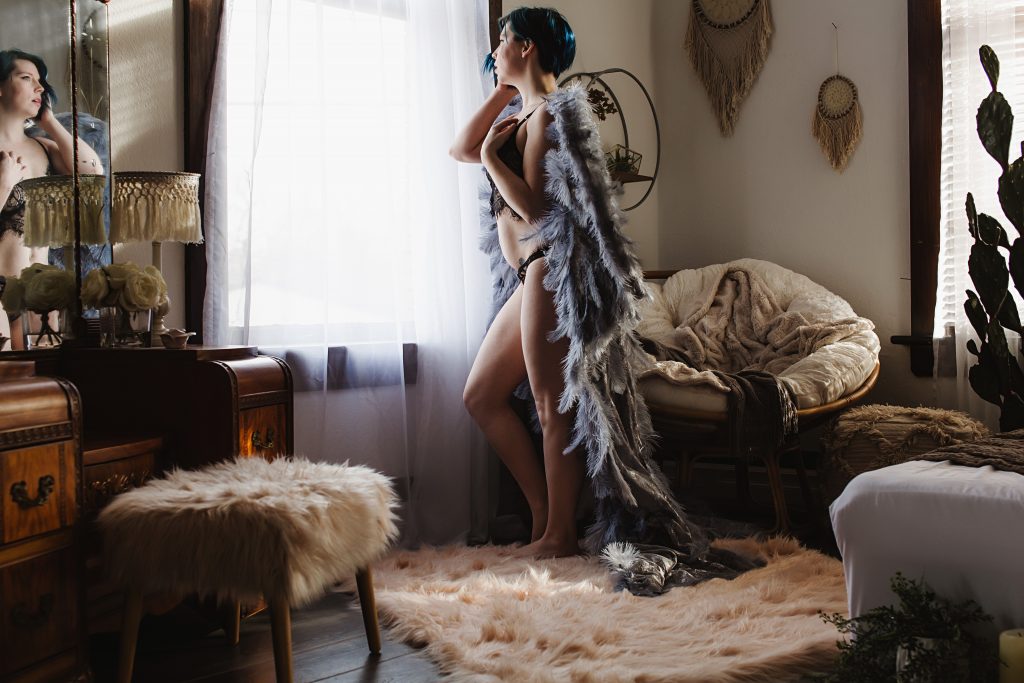
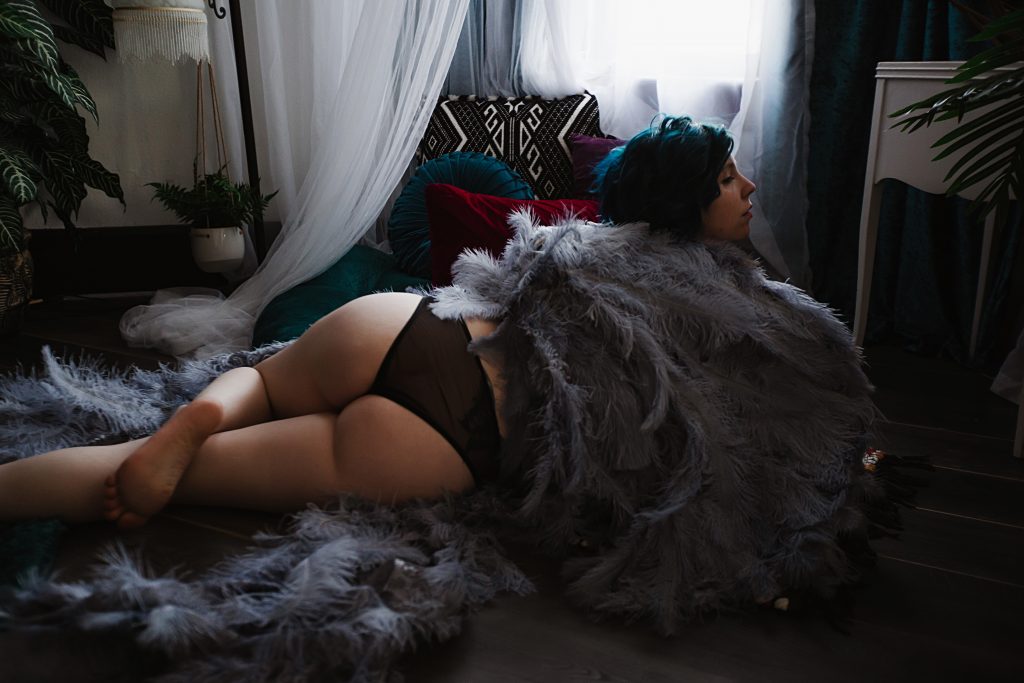
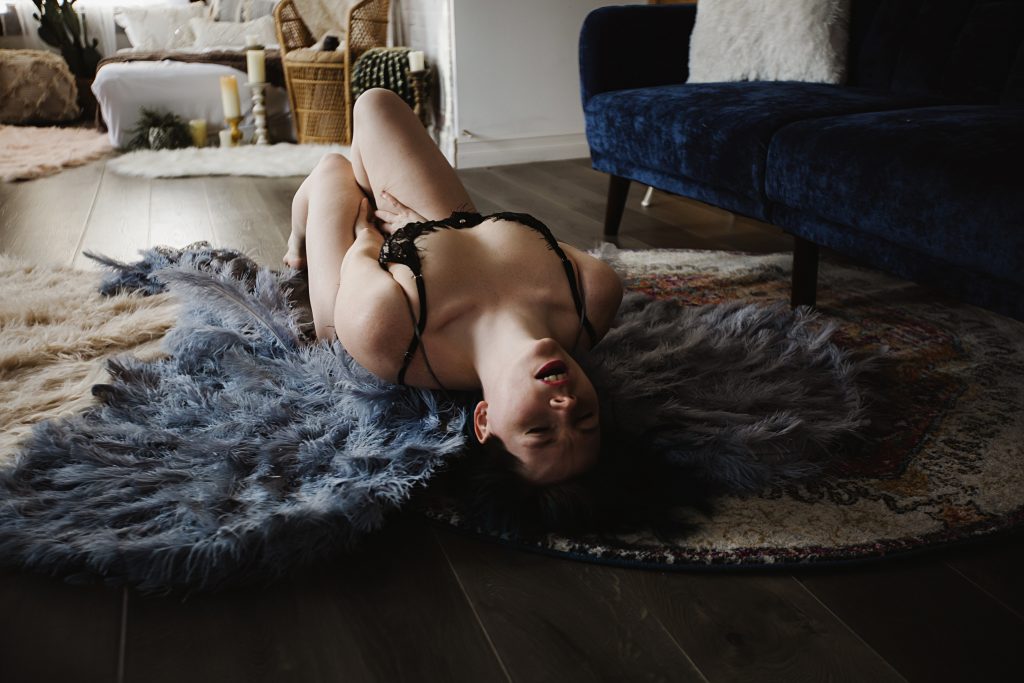
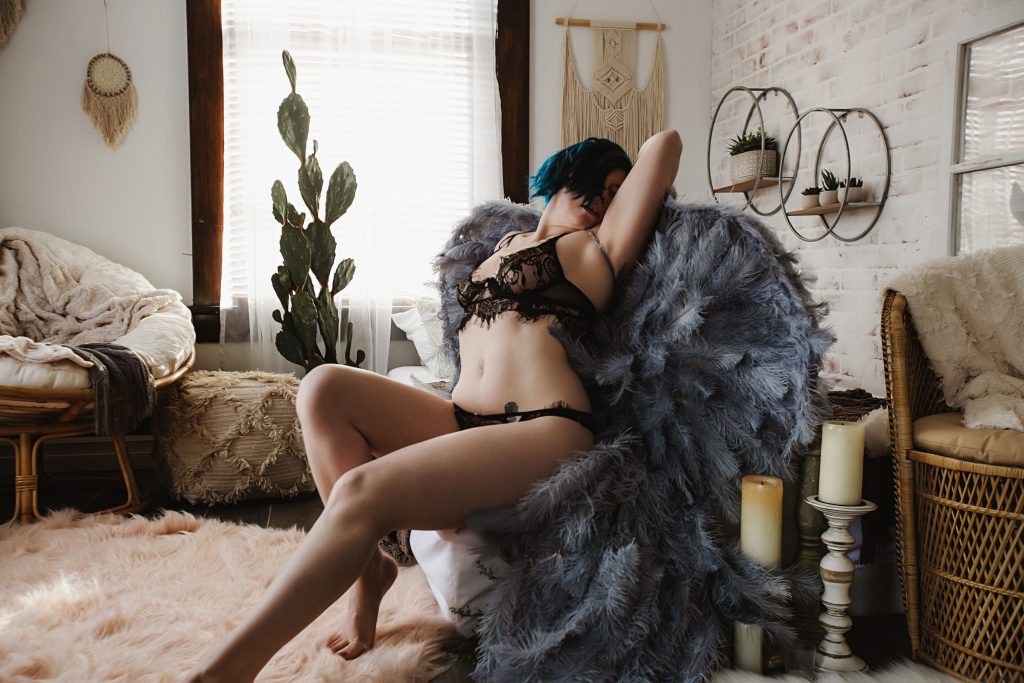
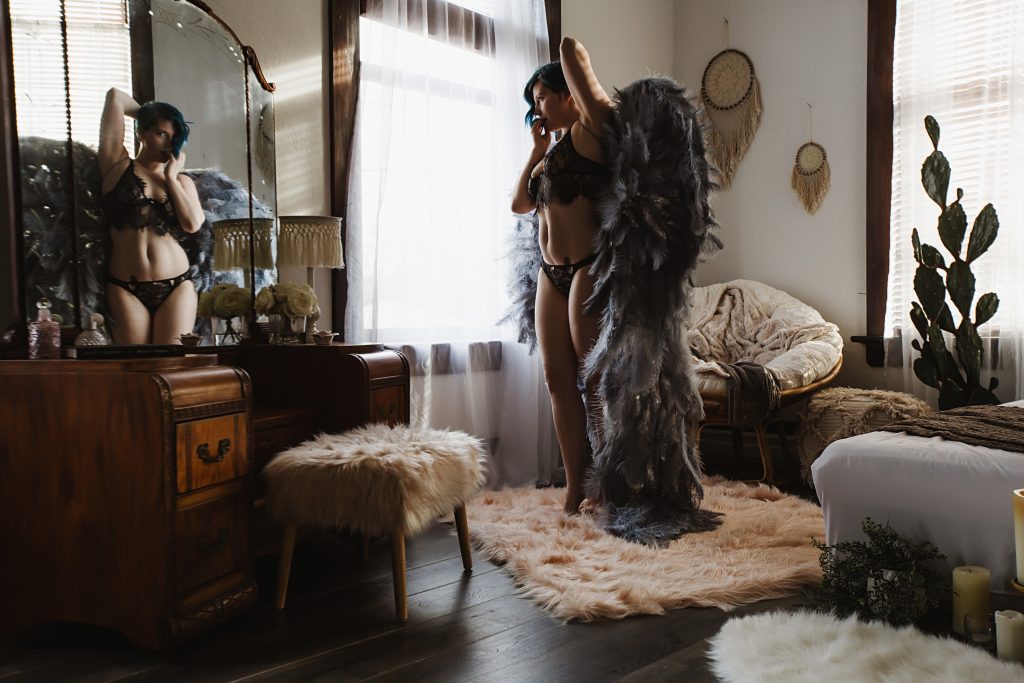
All FINISHED!
Unfortunately I didn’t have enough feathers to finish the wings. So I ordered another 200 8″ feathers from Ebay – for a total of 500 6-8 inch feathers. I will finish them as soon as they come in (in about 10 days). But they were finished enough that I could use them today for a practice run.

I use the other half yard of fabric to create a fun gathering at the back of the wings, and to give the bottom weight and movement.

Oh, and how do they look on? You tell me. I think these DIY Angel Wings are pretty freaking awesome! Great for cosplay or boudoir sessions.

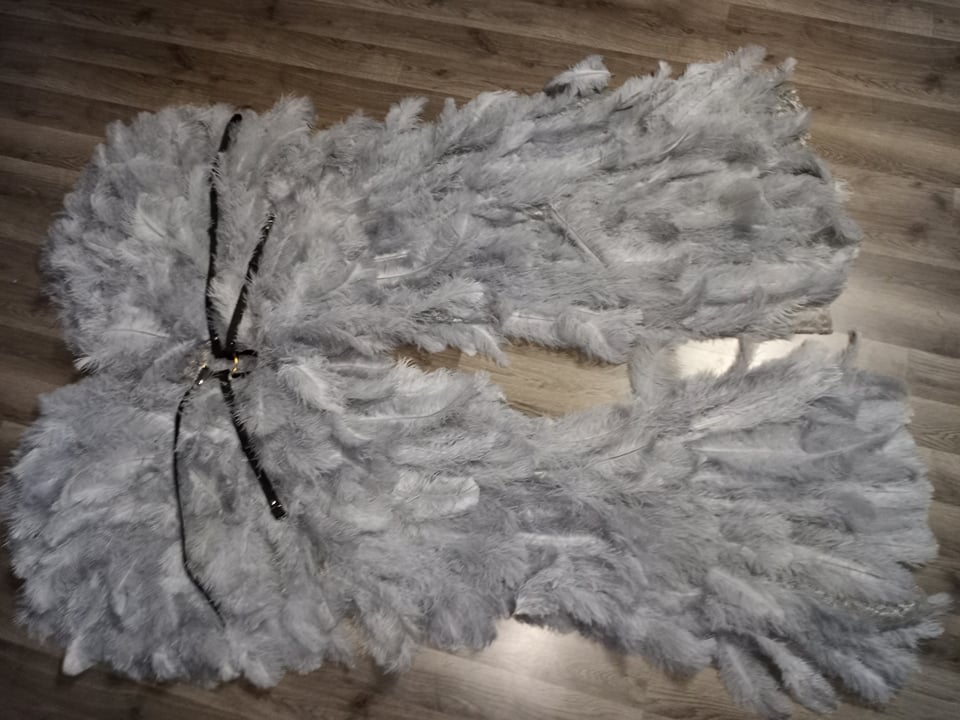
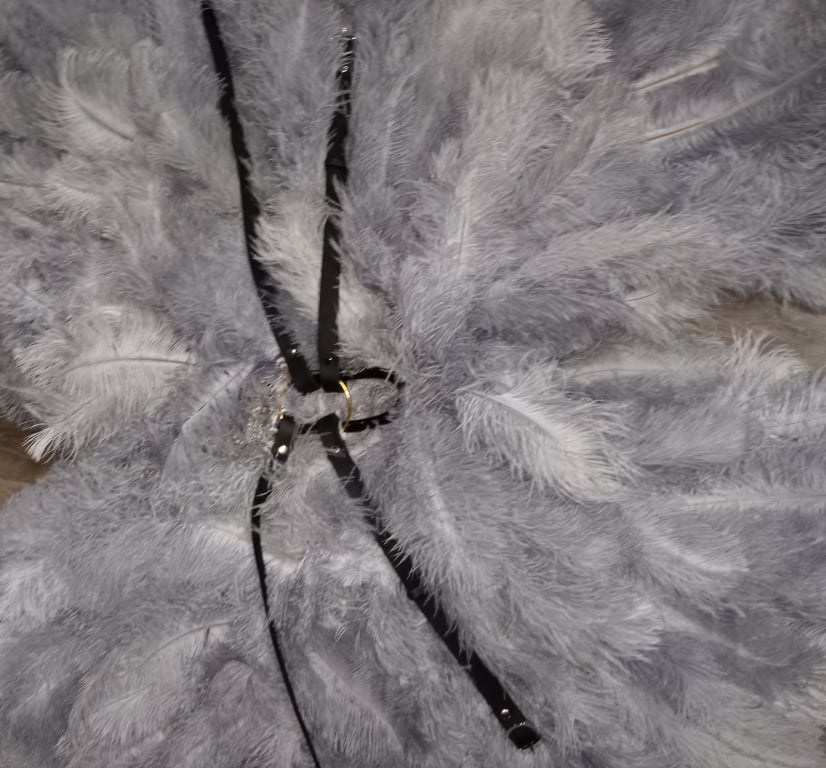
UPDATE: The wings have been living their best life and have been well loved to the point where I decided to make sturdier, more adjustable straps that way EVERY body can enjoy their majesty. I snapped some quick pics of the new harness I made using 1 inch leather strips, rivets, simple buckles and a 3- inch O ring and a rivet tool.
Interested in learning more about my Akron boudoir sessions and the packages I offer? Check out my boudoir page here. Looking for something unique that isn’t listed on my site? Don’t be afraid to ask! I’d be happy to set up a customized session just for you.
Here’s how you can get in touch with me:
Love Gwaltney
Grá Intimate Portraiture
Your Akron Boudoir Photographer
Phone: (234) 208.5744
